MakeICT January News: Kansas Day, David Springs, LED Trees, Budget Overview
|
||||||||||||
|


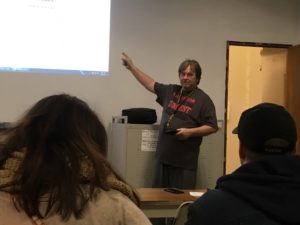
January Featured Monthly Maker David Springs
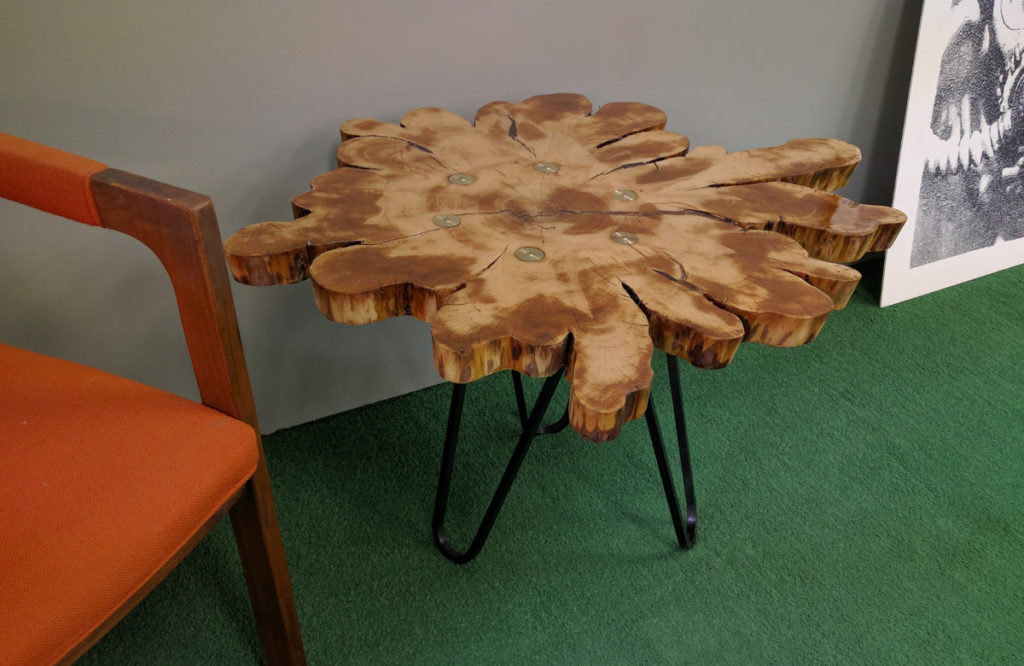
Cypress Table by David Springs
MakeICT’s Featured Maker for this month is David Springs. David rents space in one of our front cubicles. “Our makerspace is like Disneyland for anyone who is creative,” he says. “It’s a place that enables folks who like to make things to actually make them!”
Being a maker is a big part of his life. Among other things, to him MakeICT means access to top-notch equipment, making dreams into reality. “It means a nice, warm wood shop instead of a dimly-lit, freezing garage, equipped with a contractor saw on a rickety stand. It means ideas and advice from other members when I’m trying to solve a problem.”
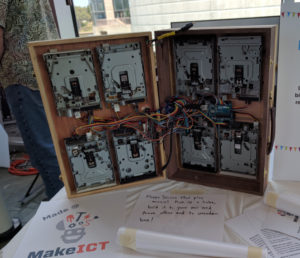
A hard drive jukebox, by David Springs
David is often at the space working on the many projects he has in development. “There’s nothing quite like taking an idea that’s in your head and turning it into an object that you can hold in your hands and share with others. I’ve always got about ten projects in various stages of development. Every time I come up with some idea, I write it down and put it on a plastic bin in my studio. Then I start collecting the materials I need, adding them to the bins as I get them. Eventually I have enough stuff to actually start building.”
Some of the projects you might have seen him working on around the makerspace:
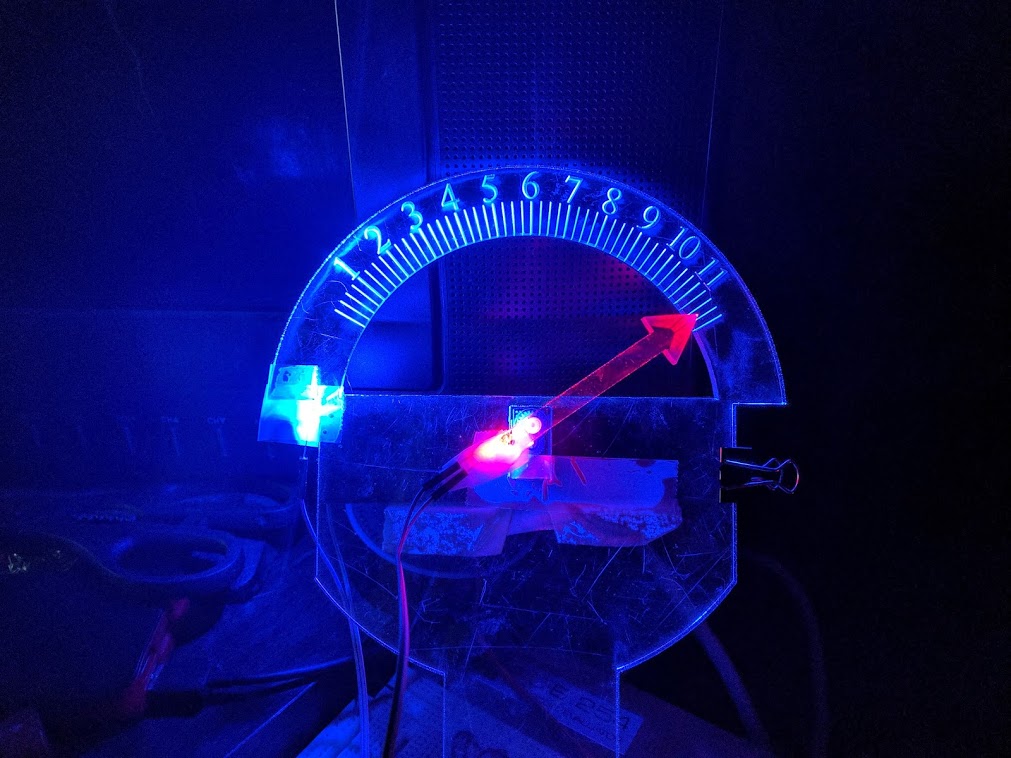
Face for the parking meter clock
- A talking Darth Vader/jukebox/night light
- Self-balancing cane
- Street art space paintings, including his entire vehicle
- A full-size old school arcade game cabinet
- Clocks out of anything – parking meters, skeletons, light up ping pong balls, analog panel meters.
- Intel Edison-powered punching/kicking dummy “for a bunch of little kids who will one day be Taekwondo black belts”

Last year while driving through western Kansas, David was inspired by the many metal whirligig-type sculptures that turn our state’s wind into moving art. He designed and completed his own gear-driven model of Godzilla eating Tokyo. “This project is probably a one-off,” David says.
And just like every project, he learned new things while working on it. This time, he learned “that sometimes things don’t work in quite the way you envision them in your head!” David used many of the resources available at MakeICT to put the whirligig together. “I’ve used the wood shop for the structure, the laser for Godzilla and the buildings of Tokyo, one of our 3D printers for some gearing and adapters, the electronics lab to give the buildings of Tokyo and Godzilla’s eyes LED lighting and sound.”
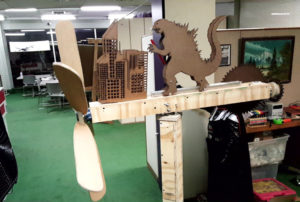
David’s Godzilla Whirligig
Thanks to Gordon Murray for contributing to this post.
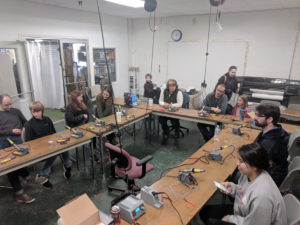
DIY LED Trees
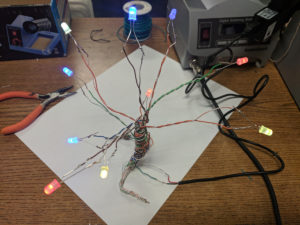
Do you love feeling the glow of wintertime? Make an LED tree! This year we offered several classes on this fun easy project for older kids and adults. Here’s how you can make your own light up tree at home.
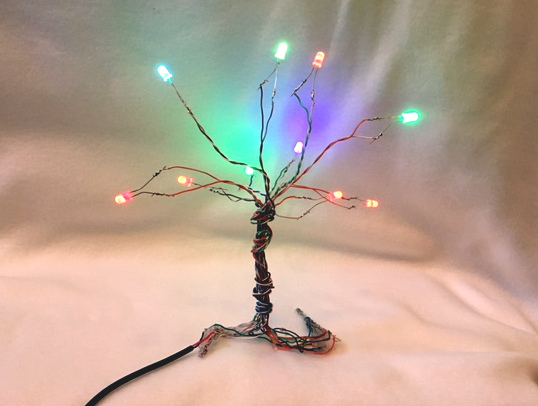
LED Tree
LED Tree Class at MakeICT
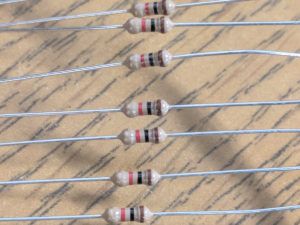
1K Resistors
You will need:
- Soldering iron & solder
- Wire – we used twisted pair to distinguish power and ground sides
- 1K resistors
- USB power adapter
- 5MM LEDs (Light Emitting Diodes) – we used color changing LEDs for a fun effect. There are lots of places to find these: amazon, ebay, mouser. Sources will change, just make sure they have only two leads (wires). There are multi-color LEDs with multiple leads to set the color based on what you hook to, but we wanted ours to fade between colors on their own.
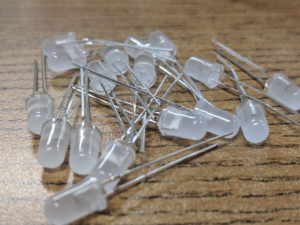
Color changing LEDs
Steps:
1) Solder 12″ of wire to each LED. We used the solid strand for the power side of the LED (longer lead) and the striped side for the ground side (shorter lead next to the flat end of the LED enclosure). It doesn’t really matter which one you use for which side, as long as you use the same scheme for each LED.
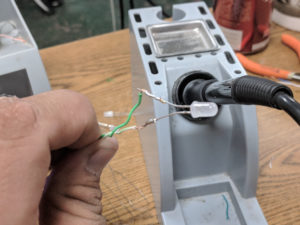
2) At the other end of each power wire, solder a 1K resistor. Resistors don’t have polarity, meaning you can solder it either way onto the wire, there’s no “backwards” when it comes to resistors.
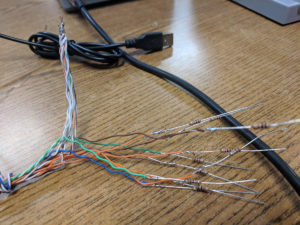
3) Solder the resistors together at a junction for the power wire.
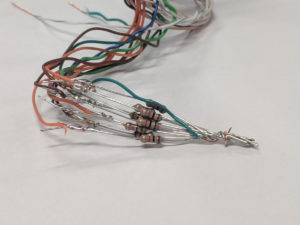
5) Solder the USB power wire onto the resistors and the ground wire onto the ends of the striped wires. The power (Vcc) USB provides 5V to the LED bank.
6) Here is a diagram of connections for reference, with dots at each solder point.

To make strong solder connections:
- Heat up your wire with the solder iron
- Touch solder to the wire, it should melt and wick on
After it’s cool use hot glue to insulate between the wires and strengthen your tree.
December Newsletter
|
|||
|
|||
|


November Updates for Members
This email was sent to members only November 5, 2017
2018 Area Lead & Assistant Signup
What is your favorite area of the makerspace? Are you passionate about its tools, potential, safety, and getting new people in to use it? If so I strongly encourage you to sign up as an area lead or assistant area lead. The signup deadline is November 27th, leads will be appointed by the board. We depend on area leads and their teams to keep our makerspace running smoothly. Sign up is here: bit.ly/makeict129
Collecting Demographics
Our demographics survey is running to help us collect member information for grants. It takes two minutes and it’s extremely important for our makerspace so please fill it out: bit.ly/makeict14
Seeking Teachers
Have you ever wanted to teach a class at the makerspace? We have tips to get you started! There will be a meeting Thursday November 9th at 7pm for members and non-members. This is a great opportunity to recruit some friends to the space who are ready to share. So many people join our space to use our tools, I really wanted to reach out to a different audience with this event, so share with lots of people: facebook.com/events/1732740153412275/
New Laser Cutter Software
As many of you know, last month the control board for our laser cutter up and died. Christian and James L did an amazing job jumping in to get it back up and running, with a new lost-cost, open source solution that would work on a lower-cost control board. It means we have to use new software but it’s not difficult. There is a 3-ring binder next to the laser cutter computer with screenshots to help you out. Learn more about getting up to speed…
Everything Else
As always, check out our calendar for everything going on at the makerspace because it is too much to list. James S has an exciting Saturday of electronics workshops planned for November 18th, get your welding classes in before the holiday rush, drop in with the Wichita Drone Club and as always, come tell us what you’re making at Maker Monday.
See you soon,
Kim
Laser Cutter Software Upgrade
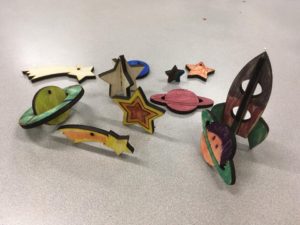
Space ornaments made with our laser cutter
If you’re an authorized laser cutter user you do not need to re-take the authorization class. The fundamentals of laser cutting haven’t changed – you need to know about graphic design, material usage, and fire safety. You can re-take the class if you want. I tell everyone who takes laser cutting basics that they can sit in the back of future classes for free, forever. But you can also just review the Wiki Page. The “Workflow” section has a brief outline of each step, and also contains a link to a presentation with step-by-step screenshots. The screenshots have been printed off and are stored in a 3-ring binder next to the laser cutter computer.
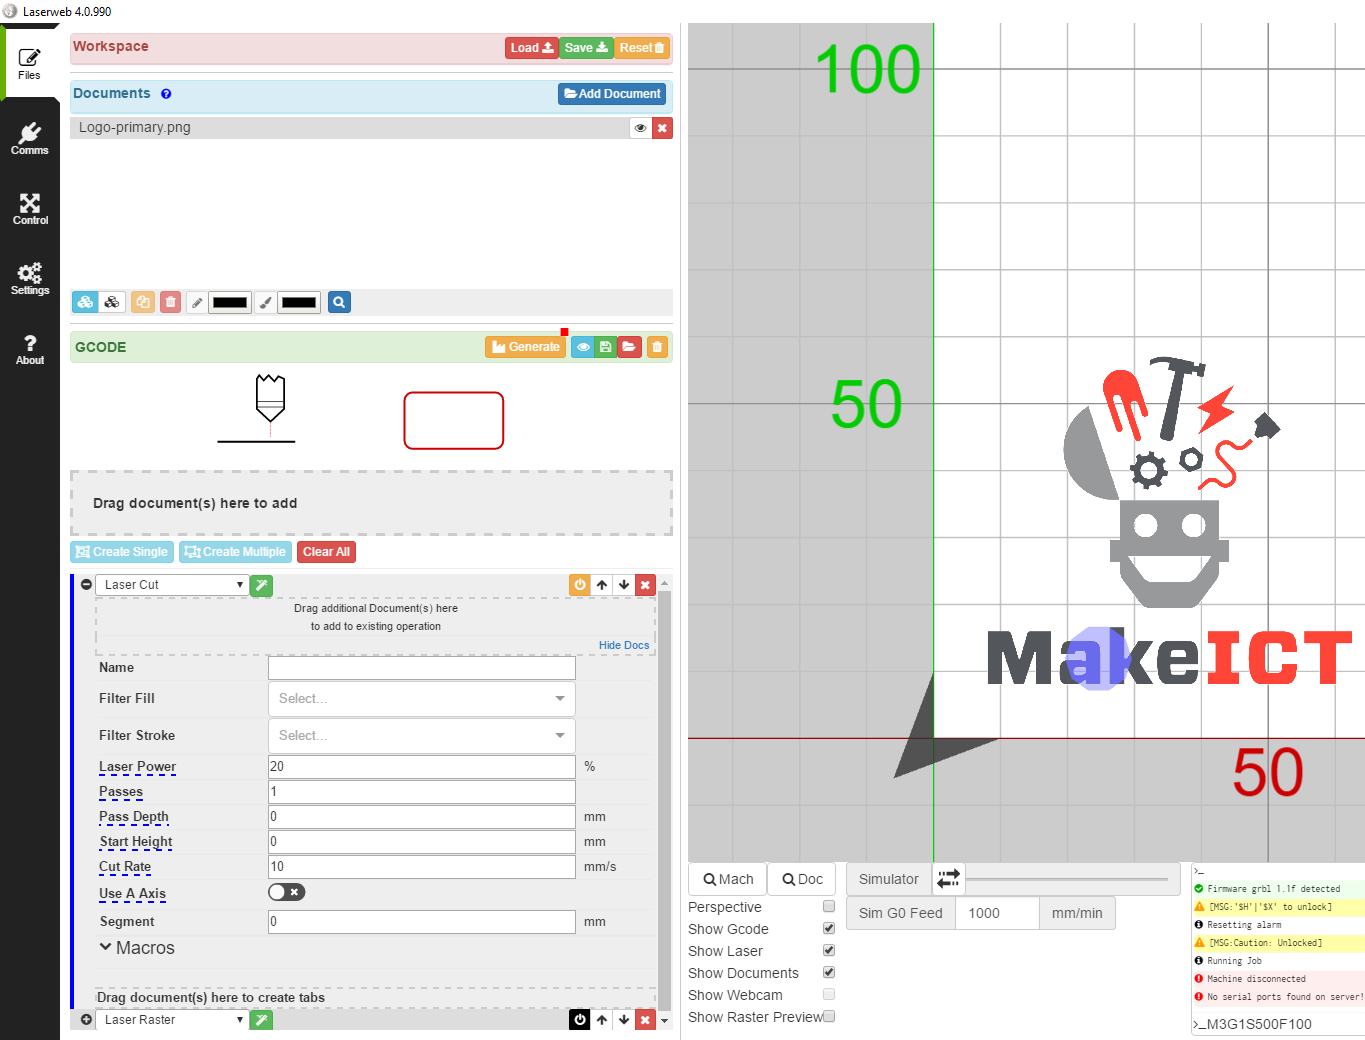
LaserWeb version 4
A few key changes to note:
- LaserWeb accepts *.png, *.jpg, *.jpeg, *.bmp, *.gcode, *.g, *.svg, *.dxf, *.tap, *.gc, & *.nc. There is no longer a need to convert your vector files to DXF, and your SVG files can have raster files embedded for engraving.
- We can now do 3D engraving – a range of power settings depending on darkness of the image.
- Power settings have changed. Try a lower power than what you’re used to. Power can now be set down to 1%. We’ve found that 6mm sanded plywood cuts at 30% power, speed 15mm/s.
One other new thing this month: we’ve added a reservation calendar to help schedule times to use the laser cutter. You don’t have to have a reservation to use it, but this makes it much easier to set aside time, meet friends to collaborate, or just know that you can make a deadline on a project. Be sure to check the calendar before you start using the laser cutter to make sure you’re not running into anybody’s reservation. If you’re in the MakeICT google group, you can add reservations yourself.
If you’re a new user, or if you just want a refresher, head to http://makeict.org/calendar for the latest class schedule.
Ceramics Gallery Show Highlights
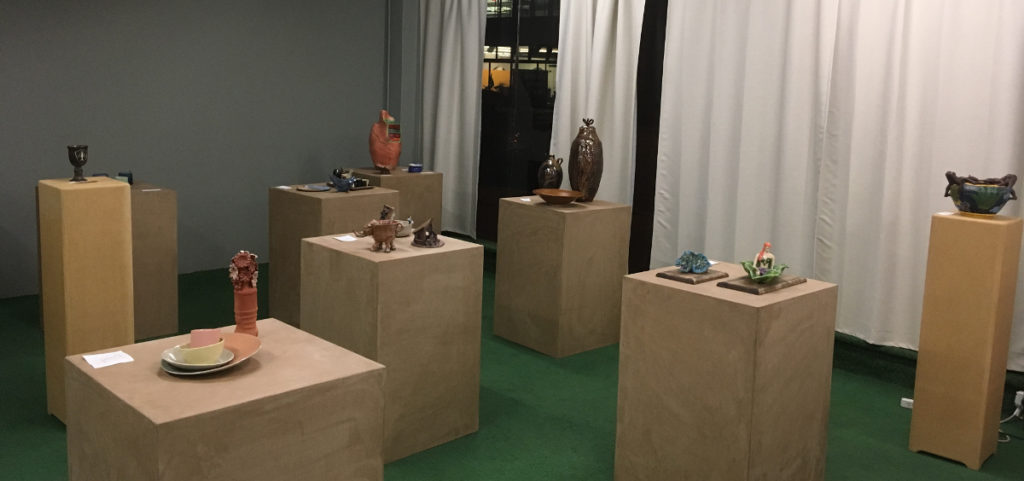
September Gallery Show – Ceramics
-

- Armando Minjarez, Vase
-

- Carder Robinson, Chalice
-

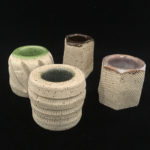
- Fiona Gridley, Bowls and Cups
-
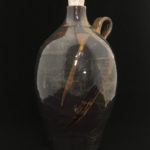
- Frank Martinez, Jug
-
- John Cody, Match Stick Holders
-

- Judy Brees, Bookcase
-

- Kelly Calbert, Fairy: New Adventure
-

- Ruth Peer, Newton Clay Works Gallery, Bird
-

- Ruth Peer, Newton Clay Works Gallery, Kansas Plate
-

- Susan de Wit, Homage to that thing we call a Human Bean
October Newsletter
|
||||||
|


From the Electronics Lab: Our Transistor Tester
At first I was thinking of doing a blog post about the multimeter, but instead I choose this guy the QS2015-T4. Fairly unassuming and in a box that might be marked “transistor tester”. Amongst the arduino and sensors, this clever guy a ATMEGA328P with some neat firmware. On the front is a screen, and a socket and a button that does stuff. Pictured here it’s interrogating the transistor we use in basic electronics. So how do you know which way to put it in the socket? You don’t, and you don’t care.
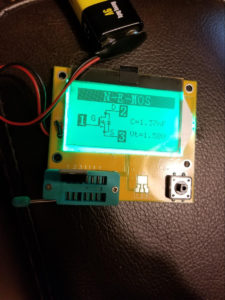
12864 Mega328 ESR
There is a 1, 2, 3 on the board next to the socket . Make sure you have a different pin in a different socket number. See the 1s at the end? All connected together. Check out the screen though. There is a 1 by the G, a 2 by the D, and a 3 by the S. It told us which pins are what. Pop in the part, push the button It figures out the rest technomagically.
Check out where it says C=1.37nF. That’s a capacitance isn’t it? It reads capacitance too. You suspect a cap being bad you can pop it in this bad boy and it will tell you what the capacitance is. I’m not saying it’s NIST traceable, but if you want to make your 555 timer wiggle and need to check that cap? This do that. Resistors, Diodes, Transistors, inductors. Put it in the socket, push the button, and there ya go. It does have some limitations. UV LEDs for instance have a high enough forward voltage that it thinks it’s a resistor sometimes. Linear regulators don’t play nice. But if you pull a resistor out and the red looks a LEEETLE orange… or if you just don’t feel like googling what the bands are. It’s way easier to use the transistor tester than to try to balance the Multimeter probes on the resistor leads.
We have another transistor tester, a red one with fewer capabilities, it works a lot the same way. But when Jens Torrel donated this guy I liked it so much, I bought one for myself. If you are just starting out in electronics, there is a different model I recommend. That’s just because it has a bunch of other stuff it can do as you go further into analogue electronics. The QS2515-T4 is perfect for the space because it’s easy to use, tells you what you want to know at the touch of a button, doesn’t take up a lot of space, and frankly, there isn’t really another piece of equipment that does what it does in there. It really is a thing that does the thing.
Make Crazy, Make Safely
JAS
All the tips for joining MakeICT
If you’re a creative person visiting MakeICT you might immediately want to know how to get in and start making. We share your enthusiasm! We have fantastic tools and an amazing community of teachers and experts to help teach you. Showing up is the first step, but getting trained and familiar with our resources can’t happen in an hour. Sometimes new visitors get overwhelmed. We have the shortest explanation on our how to join page, but here is the long form: all of our recommendations for getting on board and making use of MakeICT.

Our key applications
Members can apply for keys that grant them 24×7 access to the space. There is no “half time” key or “you can’t be here by yourself” key – there’s only the 100% key, so we don’t issue it first time you walk in the door. You can get a key within your first month or even first week if you visit a few times. You need to fill out an application and have six other members sign it. We’re a co-op, so it’s important for us to all be able to talk to each other: your key application proves it. It’s a great opportunity for you to meet some people in the space! Printing out a key form and bringing it around with you when you visit the space is a smart first step if you’ve just become interested in MakeICT, even if you haven’t officially joined yet. For more information about our key policy, visit http://makeict.org/wiki/Standing_rules#Key_Policy
Orientation
Attending Maker Monday orientation is a requirement for a key as well. You’ll get a tour of the space and meet our leaders to ask questions. Orientation is exciting; in our 7,000 square feet there’s a woodshop, metal shop, fabrication lab with 3D printers, a laser cutter, artist studios, textiles area, ceramics room, print shop… a lot to see! Hopefully you’ll leave with a good feeling and a starting point for what to jump into first.
Safety classes
Safety classes are required for use of the metal shop, wood shop and laser cutter. If you know you’re interested in these items, watch the calendar for classes. You can take a safety class even if you haven’t joined or attended orientation, getting one of these under your belt is a great way to know that you can use the space. There is a discount on safety classes if you are a member.
Public events
MakeICT has other public events besides orientation that are great to jump into. Maybe it’s area-related, like our monthly textiles tribe or Tuesday ceramic nights. We have casual social meetups like game night and parties. And of course there are always chances to volunteer for our kids or community events. Pay attention to the calendar and forums to see where to join in.
Paying dues
At any time in this process, you can pay dues! You have to pay dues for us to accept your key application, but you can do everything else – gather application signatures, take safety classes, attend orientation and public events – before you officially join. Dues are $25 a month and can be paid monthly, every six months, or every 12 months. Paying members receive class discounts and the money paid in helps with our mission to unite Wichita’s technology and art communities.
Ready to make!
When you’ve gotten to know us, attended safety classes, paid your dues and have your key, you’re as “in” as anybody. The road to being a MakeICT expert is a pretty short one, but there’s always more to learn with new tools coming in and classes on the calendar. You’ll know some of your fellow members by this time so you’ve got the go-to names down for just about any question.
But the real thing to know is this: your onboarding process is whatever you make it. You can change the order up – take some classes before you even go to orientation. Gather key signatures before you pay dues. Get to know us before you take classes. The order is up to you. We’d be happy to help you figure out the right process if you’re stumped, just let us know more about your schedule and we’ll be happy to help.